A couple of friends were curious about how I did
my ghost picture for my recent project. Just in case you have no idea what I’m talking, I started a
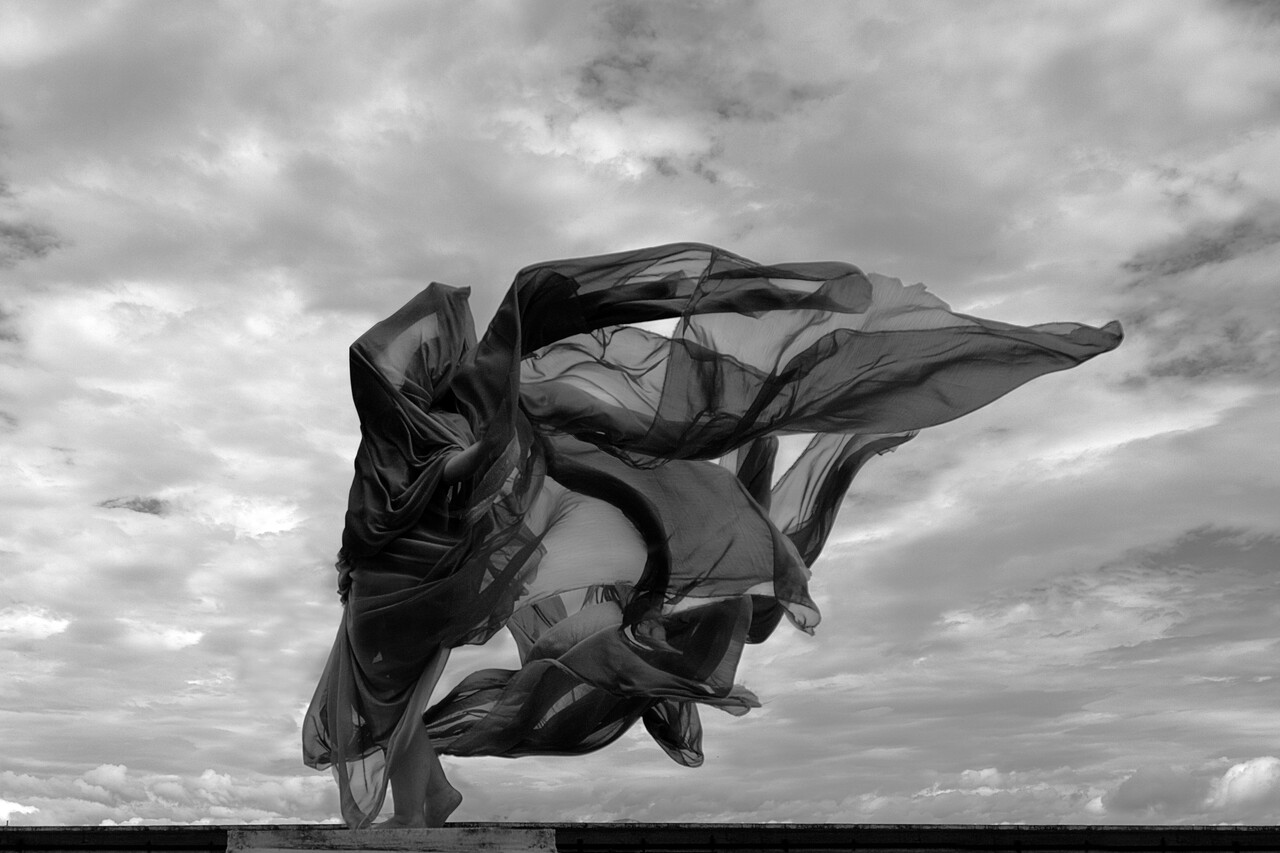
small photo-project to explore light and shadows and as usual, tell stories… long time I didn’t do it, right?
I tried to record it 2 times with
Gnome’s desktop recorder but kept failing (I was an avid user of recordmydesktop), so finally on my 3rd attempt I used
SimpleScreenRecorder which ended up being super easy to use, and not lagy at all. Since I got the recording on the 3rd time, this is not the picture I posted (probably better after so much damn practice, but who cares), so if you see differences between both, now you know the reason.
Here’s the TimeLapse video of the edit because I doubt you want to see 39mins of me cleaning sky and fabrics with a mouse, however, since I know people might get bored, below the video you will find a list of some of the parameters I used for the full edit.After selecting the images that would help me archive the final output I started the editing. I used
darktable for the pre-processing and get the main black/white images. For most images I used pretty much the same modules (a few adjusts here and there to exposure since was working with 100% natural light):
- Monochrome Module: Just because I like to have a base sample of the monochrome version.
- Filmic
- Middle Gray Luminance: 9.13%
- White Relative Exposure: 2.81 EV
- Black Relative Exposure: -7.98 EV
- Contrast: 1.574
- Shadows & Highlights: 2.25%
- Equalizer (Check Video)
- And a bit of Highpass to help my old camera (Check Video)
[cq_vc_beforeafter beforeimage=”6569″ afterimage=”6568″ autoslide=”0″]Once that was done, copied the style to the rest of the pics and ended up with several images to play.
It’s mostly play with each image until you get the result you want. The
GIMP process is hard to explain through steps, but there are a couple of tricks that I think are important to follow while doing this kind of edits:
- Work with mask layers… If you use just the eraser, you will end up deleting things that you might need later. So use masks, own them… love them…
- When come to fabric borders, use the curve and fine tune them easily.
- Merging fabric isn’t easy and takes time. There’s no magic formula.
So for the editing part you will definitely will have to check the video and enjoy the 39min -to- 5min cut :)[cq_vc_beforeafter beforeimage=”6568″ afterimage=”6575″ autoslide=”0″]