When we are creating a book that will be published at Amazon Kindle Store and we want it to be printed as well as digital, we need to have some important considerations when comes to create the cover.
It’s not just about having an attractive cover that encourage readers to buy, but it also has to be functional when comes to content, paper type and even the thickness of the book itself. Anyway, the idea is to have a working cover that won’t ve rejected by the automated verification process that Amazon holds.
When comes to select our book properties, we not just have a wide sizes variety, but also we have to decide is it will be printed on black/white or color. Besides, we will have to choose the thickness and quality of the paper, so we can begin to estimate the size and cost of our book.For this example, we will assume we are creating a cover for a 6″x 9″ (15.24 x 22.86 cm) bookThe most important when comes to create a book cover are the dimensions, since it won’t matter to have a fantastic cover that crops, is unreadable or is misplaced and not aligned correctly. This is why we will use an online service that will help us run the necessary calculus to save time and effort:Lets asume we have a 100 pages book, and we will use a White paper for color impressions.

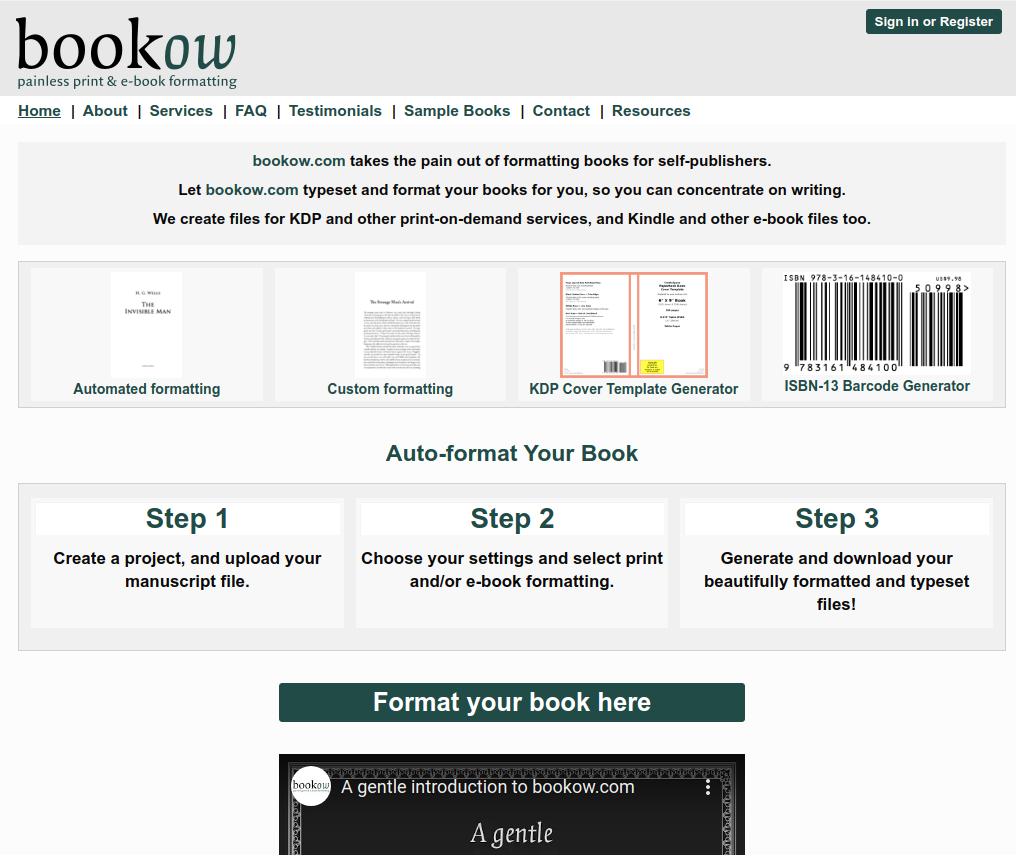
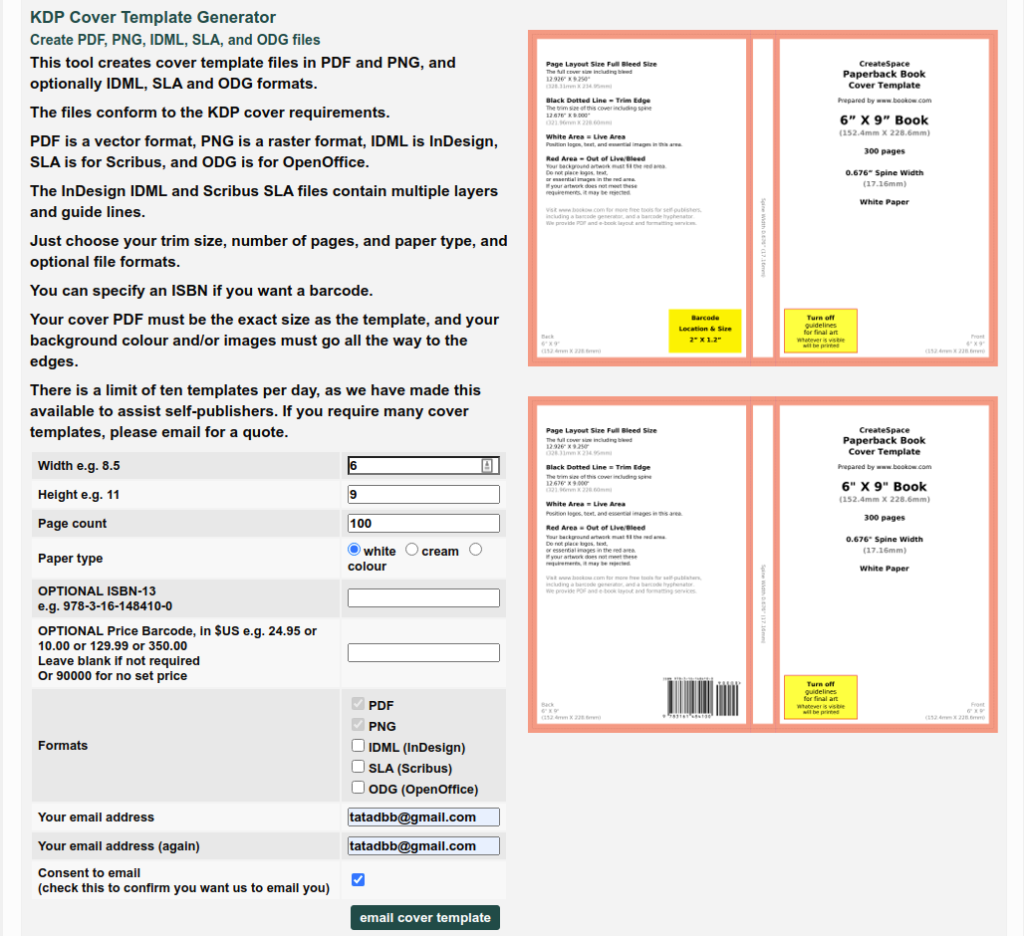
This type of paper has a thickness of 0.002347″ (0.00596138cm)This web allows us to play with several options that include pre-formats to start writing our books, generate the ISBN bar code, but the option we really need is the KDP Cover Template Generator. So click on itOn this form, we will have to fill the data requested on each field just as follows:
- Width: 6
- Height: 9
- Page count: 100
- Paper type: select white colour
- OPTIONAL ISBN-13:Leave this in blank
- OPTIONAL Price Barcode: Just leave this in blank
- Formats: Select the ones that I put on bold, which are usually already marked
- PNG
- IDML (InDesign)
- SLA (Scribus)
- ODG (OpenOffice)
- Your email address : [email protected]
- Your email address (again): [email protected]
- Consent to email: Check this last field to consent that you want them to send you an email.
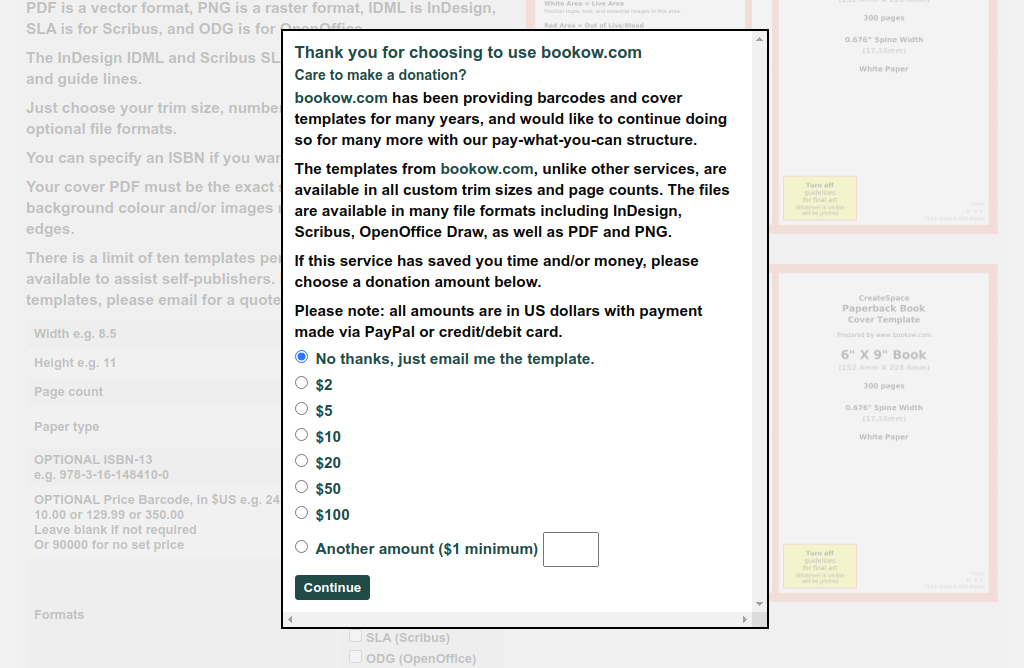
Finally click on the “Email Cover Template” button and this will display a popup with the option to leave a donation. Remember to always leave a tip if you can since this services don’t have funds beyond their own users.

If you can’t make a donation, then simply select the first option that says “No thanks, just email me the template” .Either you make a donation or not, you will finish the process with this donation page again, but this time with a success message that ask you to check your email and download your guides.

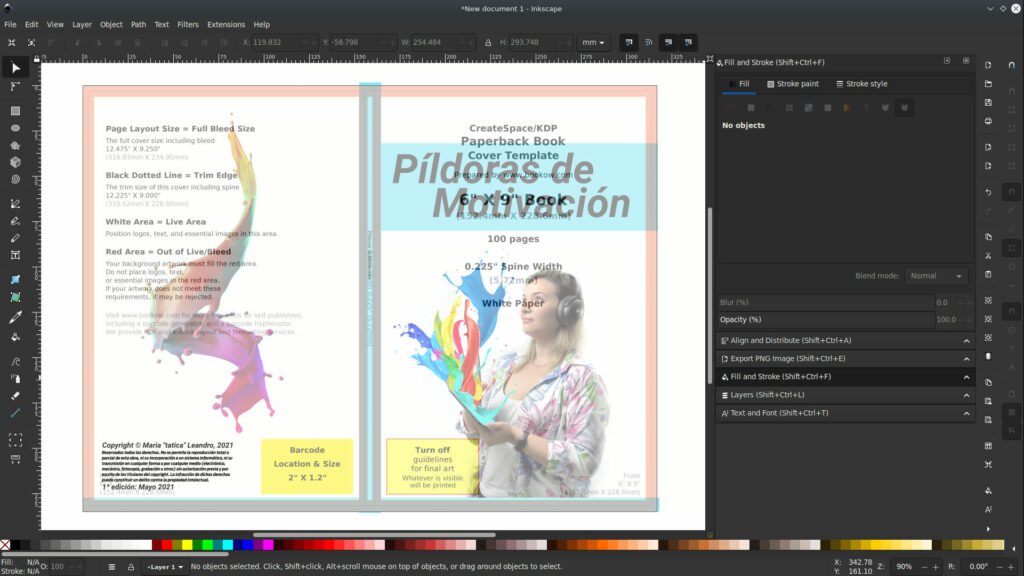
Just do so and download either the png or pdf with the desired layout. I’m gonna open it with inkscape to start designing my cover.We add the image with our layout to inkscape and adjust the size of the canva to the one at the image (the outside). This will allow our design to already include the cut margins or bleeds that always give us a headache.
We will design our cover following the guide lines and respecting the margins, only writing our content on the white parts of the layout. We will include our title, images, description but remember to leave the space for the ISBN since Amazon will add it automatically in case you don’t have one.It’s important to mention that the section we usually forget is the name at the book mold. Make sure that this text is within the white line at the very center of the layout without touching the red border so it pass the Amazon KDP filters.To work more comfortably, I set the layout image to a 60% opacity and put it on top of everything, that way I was able to see every element below the layout and move them better. But this is just a personal recommendation.

Once happy with your design, just delete the layout image, export your cover at 300DPI and you will be set to upload it at Amazon KDP.Let me know if this tutorial was useful and if you created your book cover easily with this tips!


