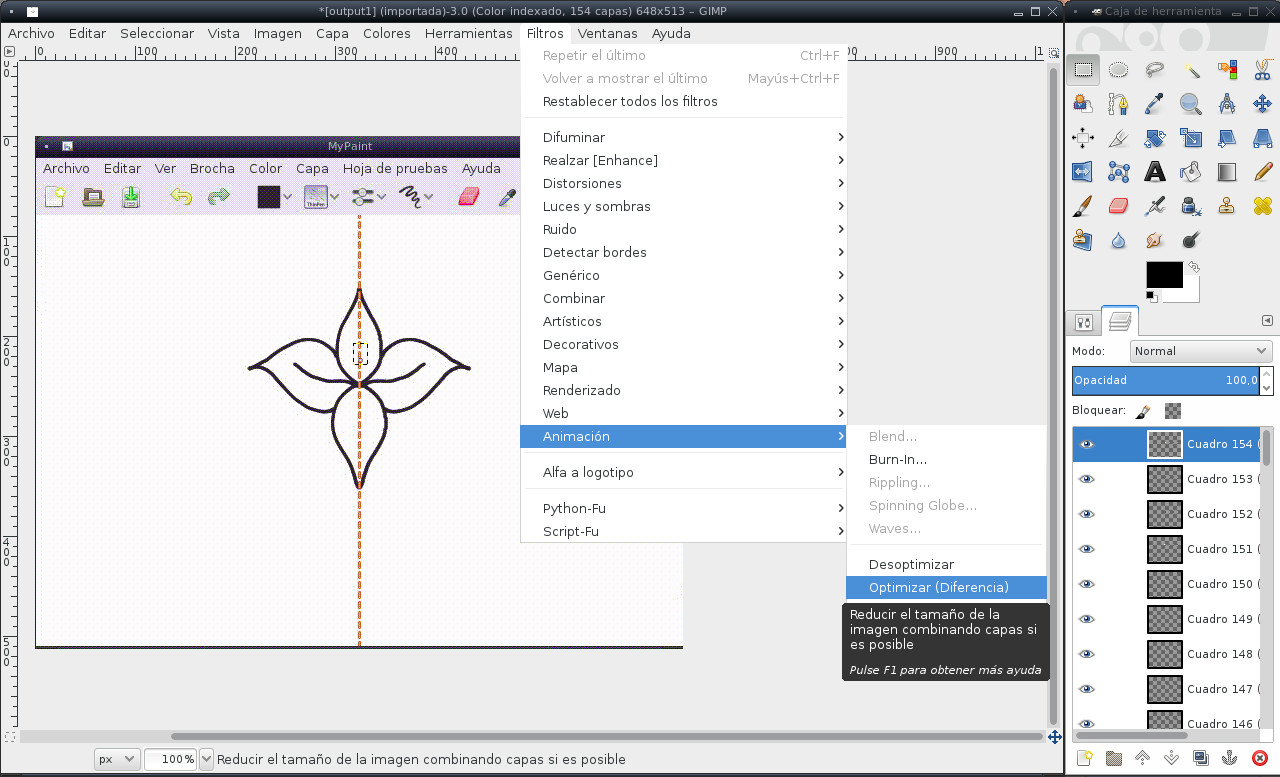
To make the previous article and create the animated gif, instead of just using a single image or make a video, I used a combination between recordmydesktop, ffmpeg and GIMP.[cq_vc_separator title=”1″ bgcolor=”#45c9e0″ fontcolor=”#ffffff” bordercolor=”#ffffff” centerbordercolor=”#ffffff” fontsize=”3em”]First we have to make our recording, and to do this, we can use any app such as recordmydesktop, Istambul, Xvidcap or any you like. In my case, I recorded an ogv, but you can choose your own format.[cq_vc_fluidbox thumbwidth=”400″ fluidimage=”5760″][/cq_vc_fluidbox][cq_vc_separator title=”2″ bgcolor=”#45c9e0″ fontcolor=”#ffffff” bordercolor=”#ffffff” centerbordercolor=”#ffffff” fontsize=”3em”]Then comes the conversion. Ffmpeg has a wide variety of options that you can use to optimize your output. From resize, to modify the quality to even choose the format, the idea is to keep it simple and then make all the necessary modifications with GIMP.ffmpeg -i input.ogv -pix_fmt rgb24 output.gif[cq_vc_fluidbox thumbwidth=”400″ fluidimage=”5757″][/cq_vc_fluidbox][cq_vc_separator title=”3″ bgcolor=”#45c9e0″ fontcolor=”#ffffff” bordercolor=”#ffffff” centerbordercolor=”#ffffff” fontsize=”3em”]Finally we can open out gif with GIMP (might take a while) and edit it. I just cut the window to dismiss the rest of the elements on my desktop, and then used the option Filters -> Animation -> Optimize (Difference) and simplified a nearly 3Mb gif to a 50k super smooth animation.[cq_vc_fluidbox thumbwidth=”400″ fluidimage=”5761″][/cq_vc_fluidbox]
Convert ogv to animated gif with ffmpeg
Written By :
Category :
General
,guias
,Linux
Posted On :
22 July, 2015
Share This :
1 Comments On “Convert ogv to animated gif with ffmpeg”
nice tutorial . I like ffmpeg.